AWS with Terraform
Deploy the Internal Scanner to your AWS account using our Terraform module. This guide walks you through every step, from installing tools to verifying your deployment.
Module Resources: Terraform Registry | GitHub
What You’ll Deploy
The Terraform module creates the following infrastructure in your AWS account:
- EKS Cluster with Auto Mode (automatically provisions and scales nodes)
- Scanner Application (scheduler, manager, Chrome controller, Redis)
- Internal Application Load Balancer (private, not exposed to the internet)
- TLS Certificate (via ACM for HTTPS encryption)
- DNS Record (optional, via Route53)
- KMS Key (encrypts Kubernetes secrets at rest)
- Monitoring (CloudWatch enabled by default, Prometheus optional)
All resources are deployed in private subnets with no public internet exposure.
Quick Start
For experienced users with all requirements ready.
Note: The first
terraform applymay partially fail due to EKS cluster provisioning timing. If this happens, runterraform applyagain to complete the deployment. See Known Limitations.
EKS API access: If you run Terraform from outside the VPC (laptop, CI/CD), you need to allow access to the EKS API. You have two options:
# 1. Create project directory
mkdir internal-scanner && cd internal-scanner

# 2. Create Terraform files (versions.tf, providers.tf, variables.tf, main.tf, secrets.tf)
#    See complete file examples below

# 3. Encrypt your Detectify credentials with KMS (see Step 6)
mkdir -p secrets/production
# ... create secrets.json, encrypt, delete plaintext

# 4. Create terraform.tfvars with your infrastructure values

# 5. Deploy
terraform init
terraform apply
# If the first apply fails on Kubernetes/Helm resources, run apply again:
# terraform apply

# 6. Configure kubectl and verify
aws eks update-kubeconfig --region eu-west-1 --name production-internal-scanning
kubectl get pods -n scanner
Need more detail? Continue reading below.
Complete Guide
Step 1: Create Project Folder
Create a directory where all your Terraform code and secrets will live:
mkdir internal-scanner && cd internal-scannerAll subsequent steps assume you are working inside this directory.
Step 2: Install Required Tools
You need three tools on your machine:
| Tool | Purpose | Version |
|---|---|---|
| Terraform | Creates and manages AWS infrastructure | >= 1.5.0 |
| AWS CLI | Authenticates with your AWS account | >= 2.0 |
| kubectl | Manages the Kubernetes cluster after deployment | >= 1.28 |
Terraform
Terraform creates AWS resources from configuration files.
macOS (Homebrew):
brew tap hashicorp/tap
brew install hashicorp/tap/terraform
Linux (Ubuntu/Debian):
wget -O - https://apt.releases.hashicorp.com/gpg | sudo gpg --dearmor -o /usr/share/keyrings/hashicorp-archive-keyring.gpg
echo "deb [signed-by=/usr/share/keyrings/hashicorp-archive-keyring.gpg] https://apt.releases.hashicorp.com $(lsb_release -cs) main" | sudo tee /etc/apt/sources.list.d/hashicorp.list
sudo apt update && sudo apt install terraform
Other platforms: Download from terraform.io/downloads .
Verify installation:
terraform version
# Should show >= 1.5.0
AWS CLI
The AWS CLI authenticates Terraform with your AWS account.
macOS:
brew install awscliLinux:
curl "https://awscli.amazonaws.com/awscli-exe-linux-x86_64.zip" -o "awscliv2.zip"
unzip awscliv2.zip
sudo ./aws/install
Other platforms: Download from aws.amazon.com/cli .
Verify installation:
aws --version
# Should show >= 2.0
kubectl
kubectl is used to verify the deployment and troubleshoot issues. You don’t need Kubernetes experience — this guide provides all the commands you’ll need.
macOS:
brew install kubectlLinux:
curl -LO "https://dl.k8s.io/release/$(curl -L -s https://dl.k8s.io/release/stable.txt)/bin/linux/amd64/kubectl"
sudo install -o root -g root -m 0755 kubectl /usr/local/bin/kubectl
Verify installation:
kubectl version --client
# Should show >= 1.28
Step 3: Configure AWS Access
Configure the AWS CLI with your credentials. See AWS Authentication for all available methods (CLI profile, environment variables, SSO, IAM role).
The simplest approach for a first-time deployment from your laptop:
aws configure
# AWS Access Key ID: (enter your key)
# AWS Secret Access Key: (enter your secret)
# Default region name: eu-west-1 (or your preferred region)
# Default output format: json
Verify your credentials are working:
aws sts get-caller-identityThis should return your account ID and IAM identity. If you see an error, check your credentials.
Step 4: Find Your AWS Resources
Before configuring Terraform, gather information about your existing AWS infrastructure.
Why These Resources?
| Resource | Purpose |
|---|---|
| VPC | Defines the network where the scanner will be deployed |
| Private Subnets | EKS nodes run here, isolated from the internet |
| Route53 Hosted Zones | (Optional) Automatic DNS and TLS certificate setup |
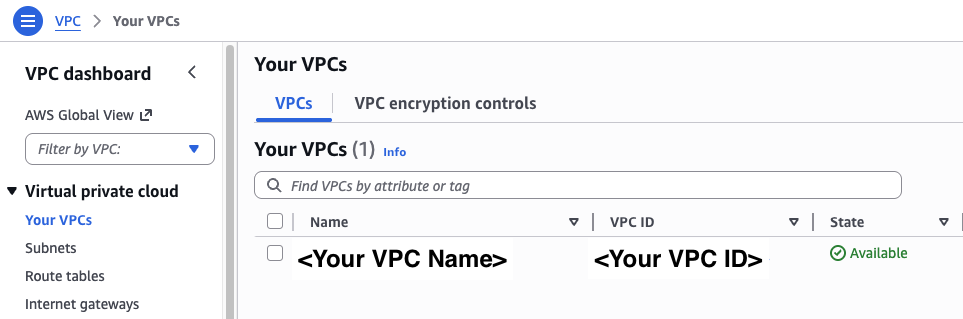
Finding Your VPC ID
- In the AWS Console, go to VPC → Your VPCs
- Copy the VPC ID for the VPC where you want to deploy (looks like
vpc-xxxxxxxxx)
VPC requirements:
- DNS resolution must be enabled (
enableDnsSupport = true)- DNS hostnames must be enabled (
enableDnsHostnames = true) — required for EKS private endpoint resolution- Outbound internet access via NAT Gateway or Internet Gateway — required for pulling container images and communicating with Detectify
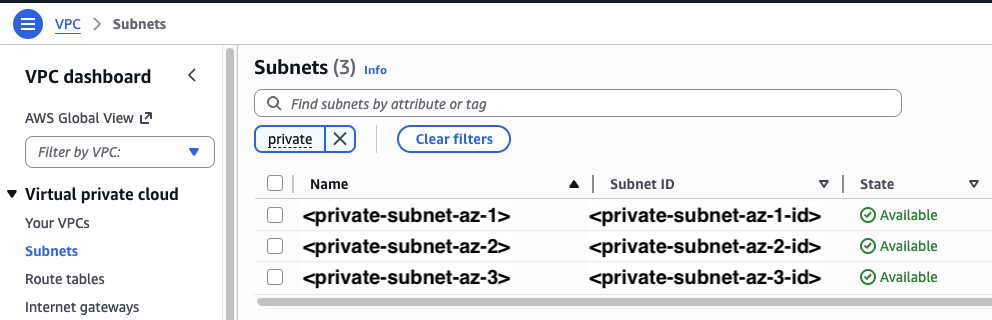
Finding Private Subnet IDs
You need at least 2 private subnets in different availability zones:
- Go to VPC → Subnets
- Filter for private subnets in your VPC
- Copy at least 2 Subnet IDs from different AZs
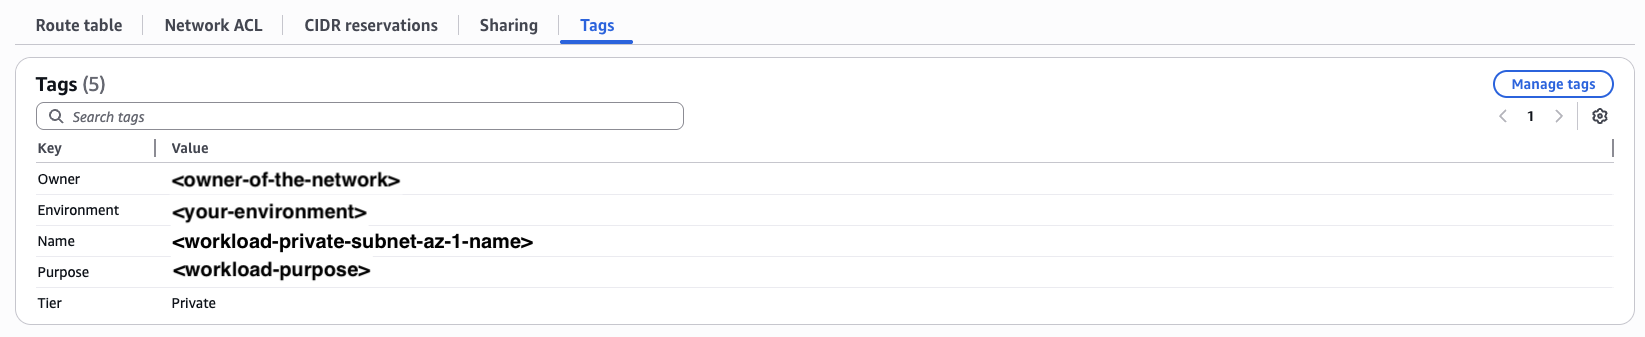
Subnet tags required: Your private subnets must have the tag
kubernetes.io/role/internal-elb = 1for the internal load balancer to discover them. If this tag is missing, the load balancer won’t be created. Add it with:aws ec2 create-tags \ --resources subnet-aaaaa subnet-bbbbb \ --tags Key=kubernetes.io/role/internal-elb,Value=1
You can also look up subnets dynamically with Terraform data sources instead of hardcoding IDs:
# Example: Find subnets by tags
data "aws_subnets" "private" {
filter {
name = "vpc-id"
values = [var.vpc_id]
}
tags = {
Tier = "Private"
}
}
module "internal_scanner" {
# ... other configuration ...
private_subnet_ids = data.aws_subnets.private.ids
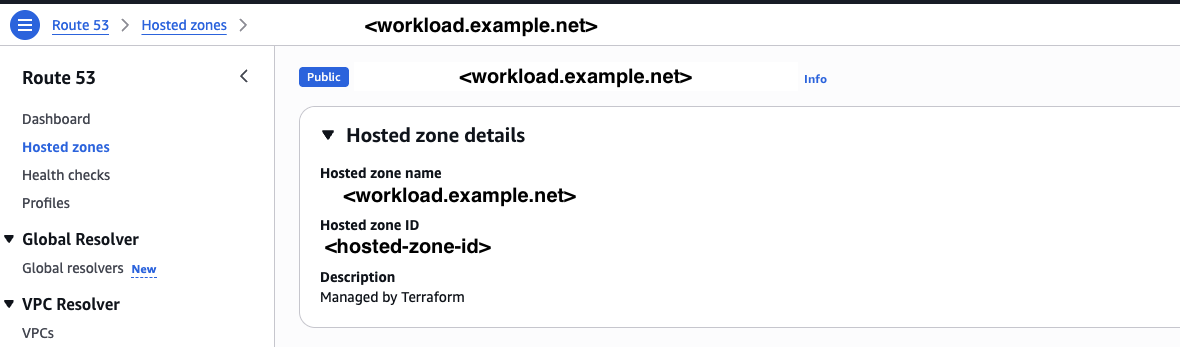
}Finding Route53 Hosted Zone IDs (Optional)
If you want automatic DNS and certificate management, you’ll need up to two hosted zones:
- DNS record zone (
route53_zone_id): For the scanner endpoint DNS record. Can be private or public. - ACM validation zone (
acm_validation_zone_id): For TLS certificate validation. Must be a public hosted zone (ACM validates certificates against public DNS).
-
Go to Route 53 → Hosted zones

-
Copy the zone ID for your DNS record zone (private or public)
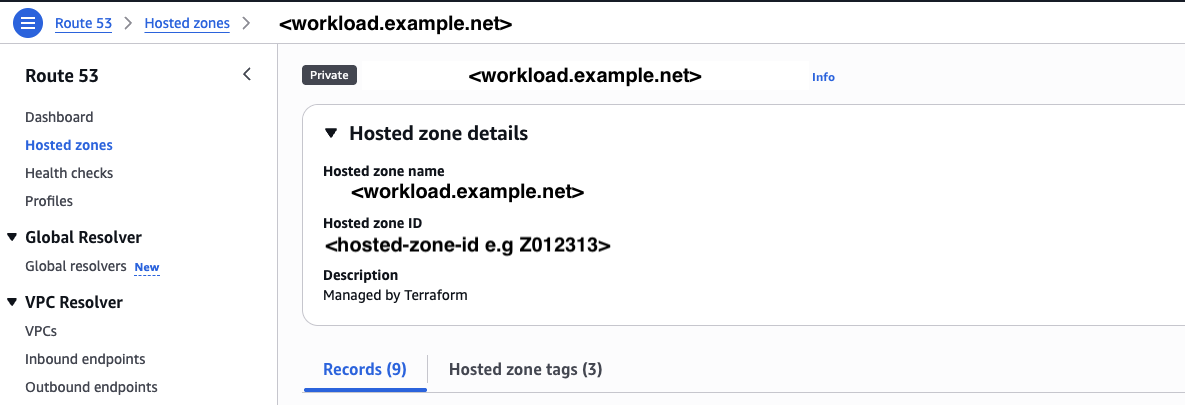
-
If the zone above is private, also copy the public zone ID for ACM validation
No Route53? You can skip DNS configuration and set up DNS manually after deployment. See Manual DNS Configuration.
Step 5: Write Terraform Configuration
Create the following files inside your project directory. Each file has a specific role:
| File | Purpose |
|---|---|
versions.tf | Terraform and provider version requirements |
providers.tf | AWS, Kubernetes, and Helm provider configuration |
variables.tf | Input variable definitions |
secrets.tf | KMS decryption of encrypted credentials |
main.tf | Scanner module configuration and outputs |
terraform.tfvars | Your specific variable values |
.gitignore | Protects sensitive files from version control |
versions.tf
Defines required Terraform version and providers:
terraform {
  required_version = ">= 1.5.0"

  required_providers {
    aws = {
      source  = "hashicorp/aws"
      version = ">= 5.52"
    }
    kubernetes = {
      source  = "hashicorp/kubernetes"
      version = ">= 2.13.1"
    }
    helm = {
      source  = "hashicorp/helm"
      version = ">= 2.9.0"
    }
  }
}
Optional — Remote State with S3
By default Terraform stores state locally in
terraform.tfstate. This is fine for a solo deployment, but if you’re working in a team or running Terraform from CI/CD, storing state in S3 means everyone shares the same source of truth.1. Create the S3 bucket (one-time):
aws s3api create-bucket \
  --bucket your-company-internal-scanner-state \
  --region eu-west-1 \
  --create-bucket-configuration LocationConstraint=eu-west-1

aws s3api put-bucket-versioning \
  --bucket your-company-internal-scanner-state \
  --versioning-configuration Status=Enabled

aws s3api put-bucket-encryption \
  --bucket your-company-internal-scanner-state \
  --server-side-encryption-configuration '{"Rules": [{"ApplyServerSideEncryptionByDefault": {"SSEAlgorithm": "AES256"}}]}'
2. Add a
backendblock toversions.tf(beforerequired_providers):backend "s3" { bucket = "your-company-internal-scanner-state" key = "internal-scanner/terraform.tfstate" region = "eu-west-1" encrypt = true }
providers.tf
Configures how Terraform connects to AWS and to the EKS cluster it creates:
provider "aws" {
  region = var.aws_region
}

# Kubernetes provider - connects to the EKS cluster created by the module.
# The try() wrapper handles the first apply when the cluster doesn't exist yet.
provider "kubernetes" {
  host                   = try(module.internal_scanner.cluster_endpoint, "")
  cluster_ca_certificate = try(base64decode(module.internal_scanner.cluster_certificate_authority_data), "")
  token                  = try(data.aws_eks_cluster_auth.cluster.token, "")
}

# Helm provider - deploys the scanner application into the cluster
provider "helm" {
  kubernetes = {
    host                   = try(module.internal_scanner.cluster_endpoint, "")
    cluster_ca_certificate = try(base64decode(module.internal_scanner.cluster_certificate_authority_data), "")
    token                  = try(data.aws_eks_cluster_auth.cluster.token, "")
  }
}

# Retrieves an authentication token for the EKS cluster
data "aws_eks_cluster_auth" "cluster" {
  name = "${var.environment}-internal-scanning"
}
Why
try()? The Kubernetes and Helm providers need the cluster endpoint to connect, but the cluster doesn’t exist until Terraform creates it. On the firstterraform apply,try()returns an empty string instead of failing, allowing Terraform to create the cluster. In most cases the first apply completes successfully, but if IAM access entries haven’t propagated yet, Kubernetes resources may fail. A secondterraform applyresolves this — see Known Limitations.
variables.tf
Defines input variables for your deployment:
variable "aws_region" {
  description = "AWS region for deployment"
  type        = string
  default     = "eu-west-1"
}

variable "environment" {
  description = "Environment name (e.g., production, staging)"
  type        = string
  default     = "production"
}

# Network configuration
variable "vpc_id" {
  description = "VPC ID where the scanner will be deployed"
  type        = string
}

variable "private_subnet_ids" {
  description = "List of private subnet IDs (minimum 2 in different AZs)"
  type        = list(string)
}

variable "alb_inbound_cidrs" {
  description = "CIDR blocks allowed to access the scanner endpoint"
  type        = list(string)
}

# EKS API access (choose one approach — see note below)
variable "cluster_endpoint_public_access" {
  description = "Enable public access to EKS API (for deployments without VPN)"
  type        = bool
  default     = false
}

variable "cluster_endpoint_public_access_cidrs" {
  description = "CIDR blocks allowed to reach the public EKS API endpoint"
  type        = list(string)
  default     = ["0.0.0.0/0"]
}

# DNS configuration
variable "scanner_url" {
  description = "DNS name for the scanner endpoint (e.g., scanner.internal.example.com)"
  type        = string
}

variable "create_route53_record" {
  description = "Create Route53 A record pointing scanner_url to ALB"
  type        = bool
  default     = false
}

variable "route53_zone_id" {
  description = "Route53 hosted zone ID for the scanner DNS record (can be private or public)"
  type        = string
  default     = null
}

variable "acm_validation_zone_id" {
  description = "Route53 public hosted zone ID for ACM certificate validation (required if route53_zone_id is private)"
  type        = string
  default     = null
}
secrets.tf
Decrypts your KMS-encrypted credentials at deployment time:
# Decrypt KMS-encrypted secrets file
# The encrypted file is safe to store in version control
data "aws_kms_secrets" "scanner" {
  secret {
    name    = "secrets_json"
    payload = filebase64("${path.module}/secrets/${var.environment}/secrets.encrypted")
  }
}

locals {
  # Parse decrypted JSON into individual values
  secrets = jsondecode(data.aws_kms_secrets.scanner.plaintext["secrets_json"])

  registry_username = local.secrets["registry_username"]
  registry_password = local.secrets["registry_password"]
  license_key       = local.secrets["license_key"]
  connector_api_key = local.secrets["connector_api_key"]
}
Alternative for quick local testing: If you want to test without KMS encryption, you can temporarily skip
secrets.tfand pass credentials directly viaterraform.tfvars. Add the four credential variables tovariables.tf(withsensitive = true) and use them inmain.tfinstead of the locals. See Secrets Management for details on both approaches.
main.tf
Configures the scanner module and outputs:
module "internal_scanner" {
  source  = "detectify/internal-scanning/aws"
  version = "~> 1.0"

  # Core configuration
  environment = var.environment
  aws_region  = var.aws_region

  # Network configuration
  vpc_id             = var.vpc_id
  private_subnet_ids = var.private_subnet_ids
  alb_inbound_cidrs  = var.alb_inbound_cidrs

  # DNS configuration
  scanner_url            = var.scanner_url
  create_route53_record  = var.create_route53_record
  route53_zone_id        = var.route53_zone_id
  acm_validation_zone_id = var.acm_validation_zone_id

  # Detectify credentials (decrypted from KMS at runtime)
  license_key       = local.license_key
  connector_api_key = local.connector_api_key
  registry_username = local.registry_username
  registry_password = local.registry_password

  # --- EKS API access: choose ONE of the two options below ---

  # Option A: Public endpoint (no VPN required)
  # Enables the public EKS API endpoint so Terraform and kubectl can reach
  # the cluster over the internet. IAM authentication is still required.
  # Restrict access to your known IPs for security.
  cluster_endpoint_public_access       = var.cluster_endpoint_public_access
  cluster_endpoint_public_access_cidrs = var.cluster_endpoint_public_access_cidrs

  # Option B: Private endpoint + security group rules (VPN required)
  # If you have VPN connectivity to the VPC, keep the endpoint private
  # and allow access via security group rules instead.
  # cluster_security_group_additional_rules = {
  #   ingress_terraform = {
  #     description = "Allow Terraform access to EKS API"
  #     protocol    = "tcp"
  #     from_port   = 443
  #     to_port     = 443
  #     type        = "ingress"
  #     cidr_blocks = var.alb_inbound_cidrs
  #   }
  # }

  # Cluster access - your IAM identity gets admin access automatically
  enable_cluster_creator_admin_permissions = true
}

# --- Outputs ---

output "scanner_url" {
  description = "Scanner endpoint URL"
  value       = module.internal_scanner.scanner_url
}

output "cluster_endpoint" {
  description = "EKS cluster endpoint"
  value       = module.internal_scanner.cluster_endpoint
}

output "kubeconfig_command" {
  description = "Command to configure kubectl"
  value       = module.internal_scanner.kubeconfig_command
}

output "alb_dns_name" {
  description = "ALB DNS name (use for manual DNS configuration)"
  value       = module.internal_scanner.alb_dns_name
}

output "acm_certificate_domain_validation_options" {
  description = "DNS records needed for ACM certificate validation (when not using Route53)"
  value       = module.internal_scanner.acm_certificate_domain_validation_options
}
Choosing an EKS API access method:
Option A: Public Endpoint Option B: Security Group Rules When to use No VPN access to the VPC VPN or direct network access to the VPC How it works EKS API is reachable over the internet EKS API is private, reached via VPN/peering Security IAM auth required + CIDR restriction IAM auth required + network-level isolation Variables cluster_endpoint_public_accesscluster_security_group_additional_rulesBoth options can be used together. Private access within the VPC is always enabled regardless of which option you choose.
What should
alb_inbound_cidrsinclude? This controls which networks can reach the scanner endpoint. Include:
- Your VPC CIDR (so applications in the VPC can communicate with the scanner)
- Your VPN or corporate network CIDR (for accessing the health endpoint)
- CI/CD runner CIDRs (if triggering scans from pipelines)
terraform.tfvars
Your specific configuration values (replace placeholders with values from Step 4):
# AWS Configuration
aws_region  = "eu-west-1"
environment = "production"

# Network Configuration (from Step 5)
vpc_id             = "vpc-xxxxxxxxx"
private_subnet_ids = ["subnet-aaaaa", "subnet-bbbbb"]
alb_inbound_cidrs  = ["10.0.0.0/8"]  # Your VPC CIDR or internal network range

# EKS API Access (choose one)
# Option A: No VPN - enable public endpoint and restrict to your IPs
cluster_endpoint_public_access       = true
cluster_endpoint_public_access_cidrs = ["203.0.113.0/24"]  # Your office/CI IP range

# Option B: VPN - keep defaults (public access = false) and use security group rules
# cluster_endpoint_public_access = false  # (default)

# DNS Configuration (optional - remove if not using Route53)
scanner_url            = "scanner.internal.example.com"
create_route53_record  = true
route53_zone_id        = "ZXXXXXXXXXXXXX"       # Private or public zone ID
acm_validation_zone_id = "ZYYYYYYYYYYYYY"       # Public zone ID (for certificate validation)
No Route53? Set
create_route53_record = falseand removeroute53_zone_idandacm_validation_zone_id. After deployment, useterraform output alb_dns_nameandterraform output acm_certificate_domain_validation_optionsto set up DNS and certificate validation manually.
.gitignore
Protects sensitive files from being committed:
# Terraform
.terraform/
*.tfstate
*.tfstate.*
*.tfplan
.terraform.lock.hcl

# Secrets - plaintext files must NEVER be committed
secrets/*/secrets.json
*.auto.tfvars
secrets.tfvars

# The encrypted file IS safe to commit
!secrets/*/secrets.encrypted
Step 6: Set Up Secrets
You’ll receive sensitive credentials from Detectify (license key, API key, registry password). These must be encrypted before storing them in your project. AWS KMS (Key Management Service) provides encryption keys for this purpose.
Create a KMS Encryption Key
# Create the key (note the KeyId in the output)
aws kms create-key \
  --description "Internal Scanner secrets encryption" \
  --region eu-west-1

# Create a friendly alias for the key
aws kms create-alias \
  --alias-name alias/internal-scanner-secrets \
  --target-key-id YOUR_KEY_ID \
  --region eu-west-1
Already have a KMS key? If your team has an existing KMS key, you can use its alias instead. Skip ahead to Encrypt Your Detectify Credentials below and use your existing alias.
Why encrypt? The encrypted file is safe to commit to version control — only someone with KMS decrypt permissions can read it. During deployment, Terraform decrypts the credentials automatically in memory without writing them to disk.
Encrypt Your Detectify Credentials
You should have received these credentials from Detectify (found in the Detectify UI under Internal Scanning Agents):
- License Key — activates your scanner instance
- Connector API Key — authenticates with the Detectify platform
- Registry Username — pulls scanner container images
- Registry Password — pulls scanner container images
Create the secrets directory and a temporary JSON file:
mkdir -p secrets/production

cat > secrets/production/secrets.json << 'EOF'
{
  "registry_username": "your-registry-username",
  "registry_password": "your-registry-password",
  "license_key": "your-license-key",
  "connector_api_key": "your-connector-api-key"
}
EOF
Encrypt the file with your KMS key:
aws kms encrypt \
  --region eu-west-1 \
  --key-id alias/internal-scanner-secrets \
  --plaintext fileb://secrets/production/secrets.json \
  --output text \
  --query CiphertextBlob | base64 --decode > secrets/production/secrets.encrypted
Delete the plaintext file immediately:
rm secrets/production/secrets.jsonYou now have secrets/production/secrets.encrypted — this file is safe to commit to version control.
For helper scripts to update secrets later, see Secrets Management.
Step 7: Deploy
Initialize Terraform (downloads providers and the scanner module):
terraform initPreview what will be created:
terraform planDeploy the infrastructure:
terraform apply
# Type 'yes' when prompted
The first apply may partially fail. In some environments, the EKS cluster gets created successfully but Kubernetes and Helm resources fail because IAM access entries haven’t fully propagated yet. If this happens, run apply again:
terraform applyThe second apply succeeds because the cluster is now fully provisioned and the providers can connect.
The full deployment takes approximately 15-25 minutes.
Step 8: Configure kubectl and Verify
After deployment completes, configure kubectl to connect to your cluster:
# Get the kubeconfig command from Terraform output
terraform output kubeconfig_command

# Run the output command, e.g.:
aws eks update-kubeconfig --region eu-west-1 --name production-internal-scanning

# Verify cluster access
kubectl get nodes
Check that all scanner components are running:
kubectl get pods -n scannerExpected output:
NAME                                 READY   STATUS    RESTARTS   AGE
scan-scheduler-xxxxx                 1/1     Running   0          5m
scan-manager-xxxxx                   1/1     Running   0          5m
chrome-controller-xxxxx              1/1     Running   0          5m
redis-xxxxx                          1/1     Running   0          5m
Test the scanner endpoint (from within your VPC or via VPN):
curl https://scanner.internal.example.com/health
# Expected: {"status": "ok"}
Step 9: Grant Team Access (Optional)
By default, only the IAM identity that ran terraform apply has cluster admin access. To grant access to other team members or roles:
module "internal_scanner" {
  # ... existing configuration ...

  enable_cluster_creator_admin_permissions = true

  cluster_admin_role_arns = [
    "arn:aws:iam::123456789012:role/DevOpsTeam",
    # For AWS SSO users, use the SSO role ARN:
    "arn:aws:iam::123456789012:role/aws-reserved/sso.amazonaws.com/eu-west-1/AWSReservedSSO_AdministratorAccess_xxxxxxxxxxxx"
  ]
}
Finding your SSO role ARN: Run
aws sts get-caller-identitywhile logged in via SSO. The ARN in the output is your SSO role.
Avoid duplicate role errors: Do not add the same IAM identity that created the cluster to
cluster_admin_role_arnswhenenable_cluster_creator_admin_permissions = true— this causes a conflict. Either setenable_cluster_creator_admin_permissions = falseand list all roles explicitly, or keep ittrueand only add other roles.
Apply the change:
terraform applyOptional: Makefile for Operations
A Makefile simplifies common Terraform and Kubernetes operations:
.PHONY: init plan apply destroy kubeconfig pods logs status restart

ENV ?=
AWS_REGION ?= eu-west-1
NAMESPACE = scanner

check-env:
ifndef ENV
	$(error ENV is required. Usage: make <target> ENV=<environment>)
endif

# --- Terraform ---

init: check-env
	terraform init

plan: check-env
	terraform plan -var-file=vars/$(ENV).tfvars

apply: check-env
	terraform apply -var-file=vars/$(ENV).tfvars

destroy: check-env
	terraform destroy -var-file=vars/$(ENV).tfvars

# --- Kubernetes ---

kubeconfig: check-env
	aws eks update-kubeconfig --name $(ENV)-internal-scanning --region $(AWS_REGION)

pods:
	kubectl get pods -n $(NAMESPACE) -o wide

logs:
	kubectl logs -n $(NAMESPACE) -l app=scan-scheduler --tail=100 -f

status:
	@echo "=== Deployments ===" && kubectl get deployments -n $(NAMESPACE)
	@echo "\n=== Pods ===" && kubectl get pods -n $(NAMESPACE)
	@echo "\n=== Services ===" && kubectl get services -n $(NAMESPACE)

restart:
	kubectl rollout restart deployment/scan-scheduler -n $(NAMESPACE)
	kubectl rollout restart deployment/scan-manager -n $(NAMESPACE)
	kubectl rollout restart deployment/chrome-controller -n $(NAMESPACE)
Usage:
make init ENV=production
make plan ENV=production
make apply ENV=production
make kubeconfig ENV=production
make status
Known Limitations
First Deployment May Require Two Applies
The first terraform apply may fail on Kubernetes and Helm resources after successfully creating the EKS cluster. This can happen because:
- Provider circular dependency: The Kubernetes and Helm providers need the cluster endpoint to authenticate, but the cluster doesn’t exist until Terraform creates it. The
try()wrappers inproviders.tfhandle this gracefully by returning empty strings on the first apply. - IAM propagation delay: EKS access entries can take time to propagate after cluster creation, depending on your AWS environment.
Workaround: If the first apply fails on Kubernetes or Helm resources, run terraform apply again. The second apply succeeds because the cluster is fully provisioned.
Terraform Destroy May Require Multiple Runs
terraform destroy may fail on the first run because the ALB controller needs time to clean up AWS resources (load balancers, target groups) before being removed itself. The module includes a cleanup delay, but you may need to run terraform destroy again if the first attempt fails.
Next Steps
Your scanner is deployed. Continue with:
- Configure Scanner — Connect to Detectify and create scan profiles
- Configuration Options — DNS, networking, autoscaling, monitoring, and BYO certificates
- Secrets Management — Helper scripts for updating secrets, AWS Secrets Manager alternative
- Reference — Costs, updates, and complete variable reference
- Scaling — Capacity planning for larger deployments